Jigsaws
Sounds
Video
Custom Shows
vba code
NaviSlides
Games for teachers
Bullets
Triggers
Security
Flash Cards
Multiple Instances
PowerPoint 2007
Mail Merge
Random events
Animation
Hyperlinks
Set spellcheck language
Control Movement With PowerPoint VBA
This is a tutorial on movement control using Up, Down, Left and right buttons. If you don't know how vba is used please read the basic tutorial here.
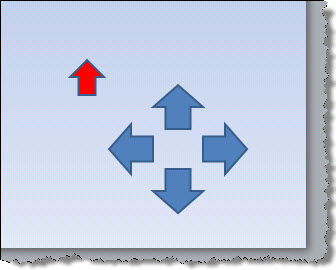
Start by creating an UP ARROW to move and four control arrows like this:

Now copy and paste this vba into a module:
Dim myname As String
Sub getname(oshp As Shape)
'gets name of shape to move
myname = oshp.Name
End Sub
Sub goright()
Dim oshp As Shape
'If shape name not picked up the code will error
'this line just runs the code on error
'but does nothing
On Error Resume Next
Set oshp = ActivePresentation.SlideShowWindow _
.View.Slide.Shapes(myname)
'rotates shape in direct of travel
oshp.Rotation = 90
'checks for edge of slide and moves shape if not there
If oshp.Left + oshp.Width < ActivePresentation.PageSetup _
.SlideWidth Then oshp.Left = oshp.Left + 10
End Sub
Sub goleft()
Dim oshp As Shape
On Error Resume Next
Set oshp = ActivePresentation.SlideShowWindow _
.View.Slide.Shapes(myname)
oshp.Rotation = 270
If oshp.Left > 0 Then oshp.Left = oshp.Left - 10
End Sub
Sub goup()
Dim oshp As Shape
On Error Resume Next
Set oshp = ActivePresentation.SlideShowWindow _
.View.Slide.Shapes(myname)
oshp.Rotation = 0
If oshp.Top > 0 Then oshp.Top = oshp.Top - 10
End Sub
Sub godown()
Dim oshp As Shape
On Error Resume Next
Set oshp = ActivePresentation.SlideShowWindow _
.View.Slide.Shapes(myname)
oshp.Rotation = 180
If oshp.Top + oshp.Height < ActivePresentation.PageSetup _
.SlideHeight Then oshp.Top = oshp.Top + 10
End Sub
Now give the red arrow an action of "Run Macro" - getname
Give the four controls an action of "Run Macro" choosing the appropriate macro direction
Make sure that macro security is low enough to run macros and test it out!
Articles on your favourite sport
Free Microsoft PowerPoint Advice, help and tutorials, Template Links
This website is sponsored by Technology Trish Ltd
© Technology Trish 2007
Registered in England and Wales No.5780175
PowerPoint® is a registered trademark of the Microsoft Corporation
